Sunday, March 2, 2014

Vivid Vases--Stamp Set of the Month

One of the sets I offered this month was Vivid Vases + some dap paper….here are the cards we created using this single stamp set.  I did cut the sentiment off of my stamp so I have 2 stamps instead of 1.  For some of my cards that was a good thing….for some others….not.  Enjoy--


I forgot to mount my vase circle on a circle of black before I attached the banner rim….sorry.  I was going to use one of the starburst framelits.  The SAB banner punch helped create the border of the circle.  The vases were paper pieced.  All designer paper used was from the Modern Medley dap pack. I cased this card from Sharon Burkert.  Love her cards and designs!

The next card was cased exactly from brandyscards.com--here.  She used the Happy Watercolor stamp set to create all sorts of texture on the vases--including a cool background!  Really creative!


The next card idea I found at stampladee.com--Deb Valder.  She has a great video on how to easily create this window card--I just couldn't let it stay at the black and vanilla.  I felt it needed just a bit of bling so I added some red glimmer paper strips and a glimmer heart (owl punch).


It's a bit difficult to get a good picture of this card so you can see the window part created with a clear window sheet panel.  The bow is created with the envelope punch board (tutorial also on Deb's blog).  Here's a picture of the card laying flat.


The last card we made was a bit brighter--it used my favorite color, summer starfruit--NOT, but I guess it looks okay here.  And I have to use up the summer starfruit baker's twine that comes in the SAB pack.


I cased this card from someone who like me doesn't know how to put a watermark on their pictures (or chooses not to).  If it's your card--please let me know and I'll give you credit!  I'll be back with more soon!  


Sunday, February 23, 2014

Embellished Events Easel Card

Hi!  I'm back with the last card I demonstrated at our party.  I got the directions for it here--they are very clear and include a tutorial!  I was inspired by the card on page 95 of the annual catalog.  Here's what I came up with:


Here's a picture with it "easel-ing" --not the best photo, but you get the idea.

Yes, I know….I went a bit jewel crazy on this card.  Are you checking out that bow??  It's made with the envelope punch board!!  Awesome--right?  Here's the tutorial I found on how to do it!   I'll be back tomorrow with some more cards to share….


Friday, February 21, 2014

Scalloped Tag Topper Punch = Love!

Yep--I'm really liking this punch--a lot.  But wow--I'm in awe of those demonstrators who think out of the box and come up with nifty new ways to use the punches.  This is one of those--


Isn't this a clever way to close the card?  I used crumb cake for the base and followed this tutorial to learn how to do this.  I then glammed up my card with paper from the Fresh Prints pack, Flower Shop flowers embossed and punched out with the coordinating pansy punch.  If by chance you have this bundle and haven't yet taken the time to figure out which petal of the flower should be at the bottom--DO IT before you try to stamp and then punch.  I bet I spent 30 minutes or so to get these flowers punched out--so frustrating!   The sentiments I used were from the Perfect Pennants stamp set.  Here's what the card looks like on the inside:


Sorry it isn't a particularly focused.  It's been a hectic week and I'm not feeling energetic enough to take another photo.  

Here's the make and take card we did at the party--I got this adorable idea from Bronwyn Eastley.  Here's the link to her tutorial on how to make it.  I did forget to put the jewels in the eyes before I took my photo.  


Here's the inside-- 


Well I'm to do some stamping--I'll be back tomorrow with the last of the cards that we did.  If you have any questions please ask!


Thursday, February 20, 2014

Lovely as a Tree on Hardwood…and more Party Fun!

Hi all!  We had a get together to stamp last Tuesday and here are a couple of the cards that I shared…hope you like them!

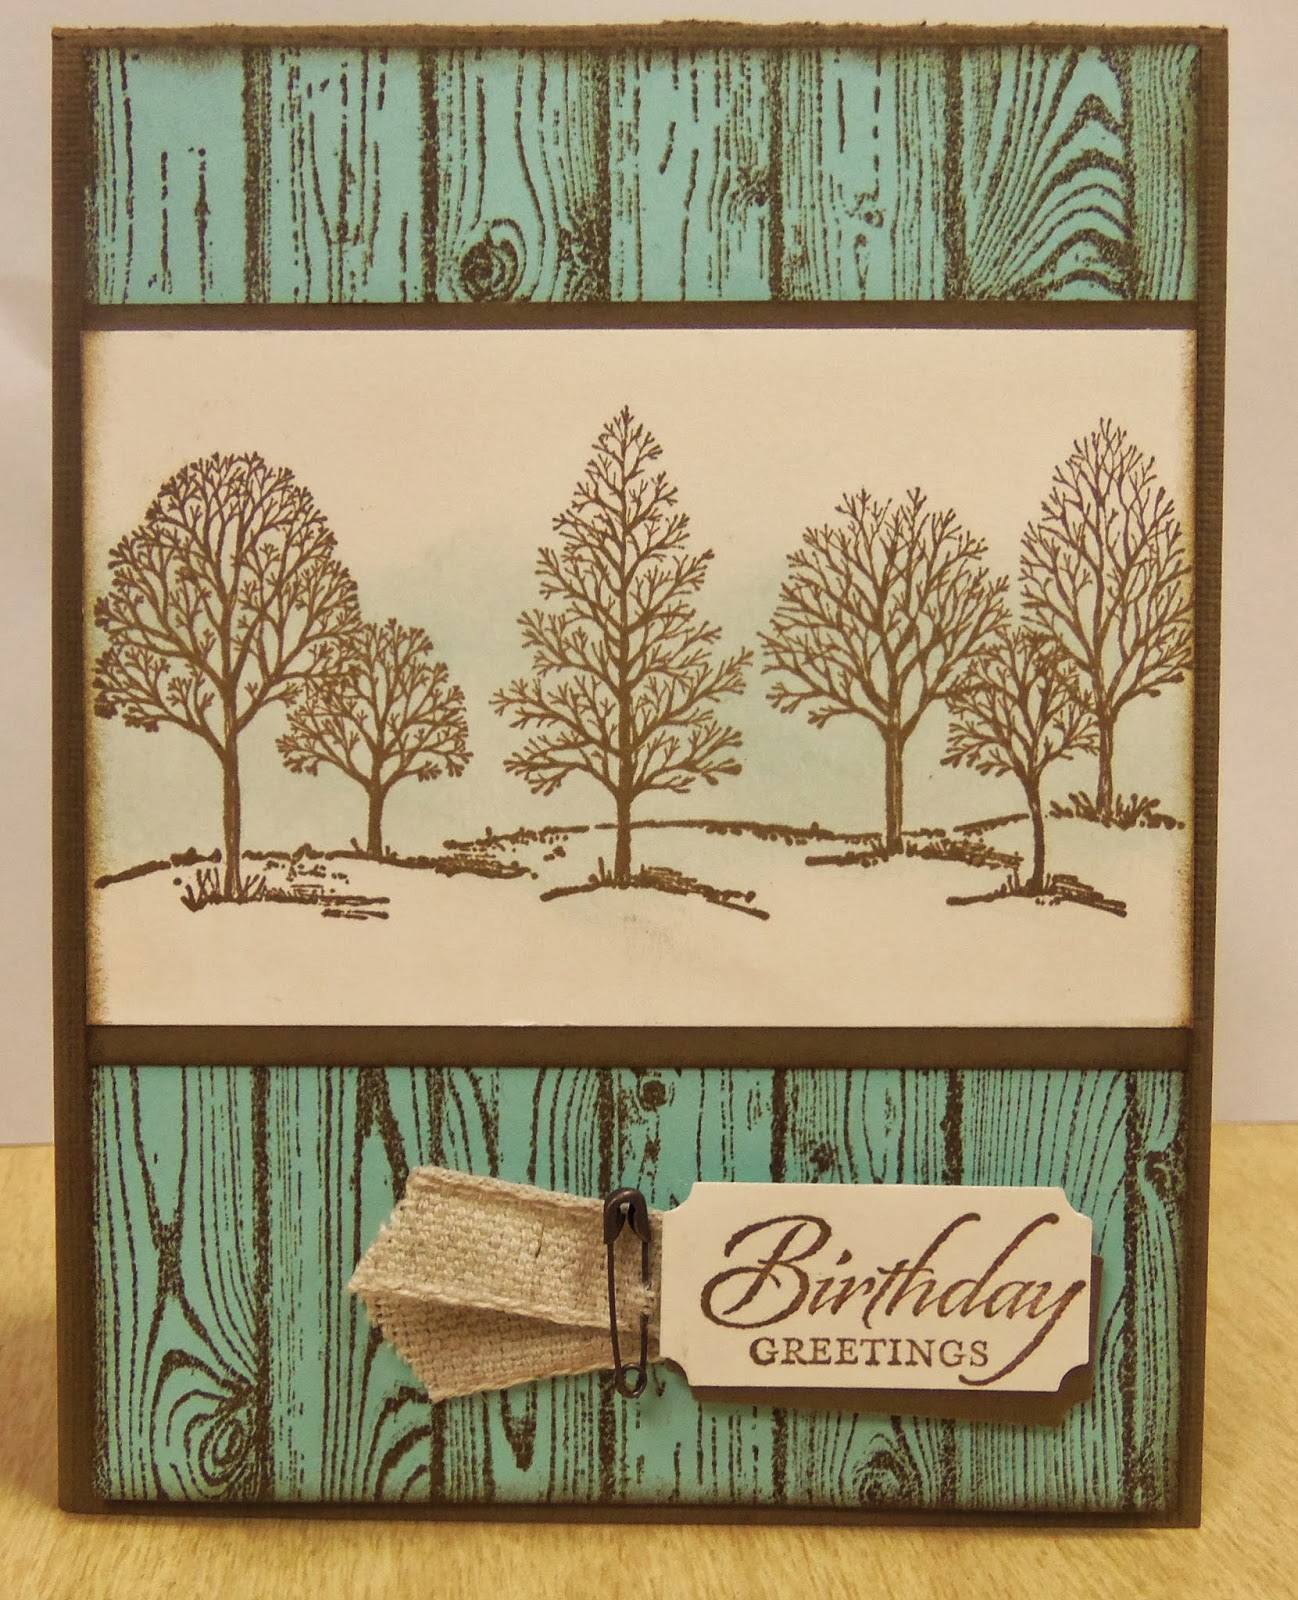
The first one uses that age old classic--Lovely As a Tree--what a great stamp set it is!  I saw basically this card and I just changed it up a bit by adding a layer and changing up the ribbon just a bit….it was cased from Lyssa Griffin Zwolanek here.


I stamped the Hardwood stamp on Pool Party card stock with soft suede ink.  The greeting is from Wetlands--and both this and the thinking of you sentiment fit in the ticket punch.  I just sponged a bit of pool party ink down the center of my very vanilla card stock before stamping the tree line on it.  The inside of the card was simply finished by adding a tree or two.


A card that I didn't demonstrate but just showed used the technique of ironing foil to freezer paper to create a foil background that you can emboss.  If you live close to me don't, I repeat, DON'T go buy any freezer paper--I have enough to last for 10 years and will be glad to share the wealth with you!


I like how you can see the reflection of my camera in the foil!  Ha!  It's hard to get a good picture of this, but it's sort of cool looking--and a cheap way to get the foil look.  I also used the stamp sets Tape It and Yippee- Skippee.  I'm not wild about the bow and have another idea of how I would decorate the sentiment--I'll have to try it and share soon!  This was cased from Artisan Award winner Erica Cerwin.

I'll be back tomorrow with some more of what we did along with a Sale-a-Bration card to share!  


Monday, February 17, 2014

Lip Smackin' Valentines

Hi all!  Here are the valentines that I made for my teaching friends!  We get a lot of sweets at school on Valentine's Day so I was looking for something to give that didn't involve candy!

I remembered a post that I saw I think on Lori Heiling's blog quite awhile ago….and have been collecting these EOS lip balms at the check-out aisles in Wal-Mart for the past few months.  Here's what they look like….


You hot glue a thumb tack on the base of the lip balm and then twist on a sucker stick to make them look like suckers.  Cute, eh?

Here's an up close of one--I created the sentiment on my computer.  


The only problem….I had to make sure and tell my friends that they were not really suckers.  Ha!


Friday, February 7, 2014

Sending Love to Mija...

Hi my stamping friends…..today I'm sharing the plethora of valentines that I made for a fundraiser.  We have an elementary p.e. teacher in our town who was struck head on as she headed to school on Dec. 20th….by a drunk driver…..at 7:30 a.m.  What are the odds?   Mija (pronounced My-uh) suffered a traumatic brain injury and remains in a coma.  She is now at a rehab hospital in Nebraska.  This weekend there is a big sale/auction to raise funds to help offset expenses that are being accrued.  My friend Heather thought that some cute little things to sell would be good since much of what has been donated is a bit pricier.  Thanks to the creativity of Becky Roberts at Inking Idaho and Julie Davison of Julie's Stamping Spot I was able to make all of these goodies:


Love these cutie patootie valentines and the little box that's added to them.  Here's a link to the directions.

Are these not adorable??  I'm so glad I'd already bought the teeny tiny coffee cups and lids.  The kisses give you an idea of how small they are!  These are on Becky's blog, but no directions there except a link I believe to get the cups.

As a teacher I definitely have a thing for itty bitty file folders!  Here's the link to the directions.
In total I made over 110 valentines…here's hoping they make some money for Mija!


Thursday, February 6, 2014

Giggle Greetings and Love You More Finale!

Here are the last cards we made with these two stamp sets.  Both were totally cased….


The card is 4 1/4" square--everyone made fun of my coloring….the shading towards the tail looks a bit more like poo than a shadow--it even has some dimensioning my picture!  Ha!  I'm liking the googly eyes on my dog.   I cased it from Leah Weir.  Thanks Leah--love it!


I got the directions for the little envelope (smaller than one listed on the envelope maker) on Stamping School.  The little scallop fits in the envelope.

I'll be back tomorrow to share some valentines that I made for a fundraiser that's coming up this Sunday to benefit a teacher friend who suffered a traumatic brain injury when her car was hit by a drunk driver when she was on her way to school right before Christmas.