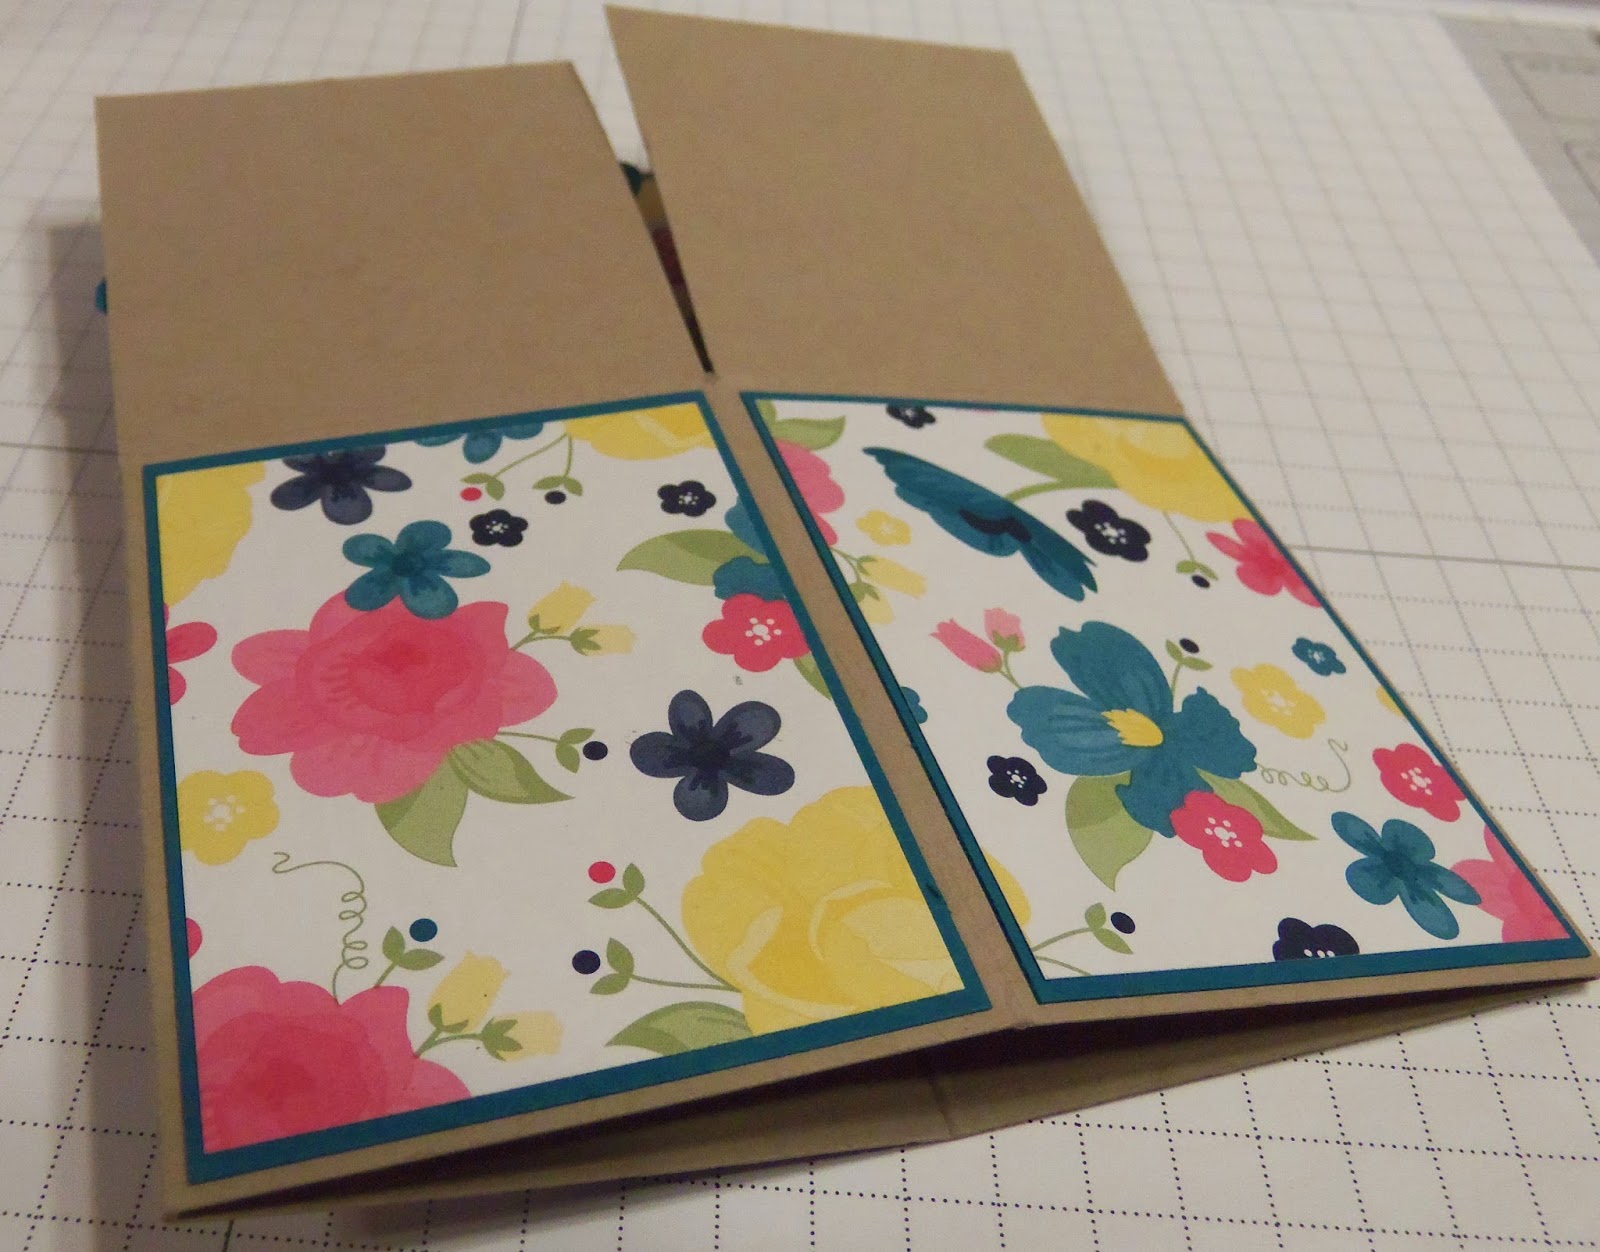
Closed:
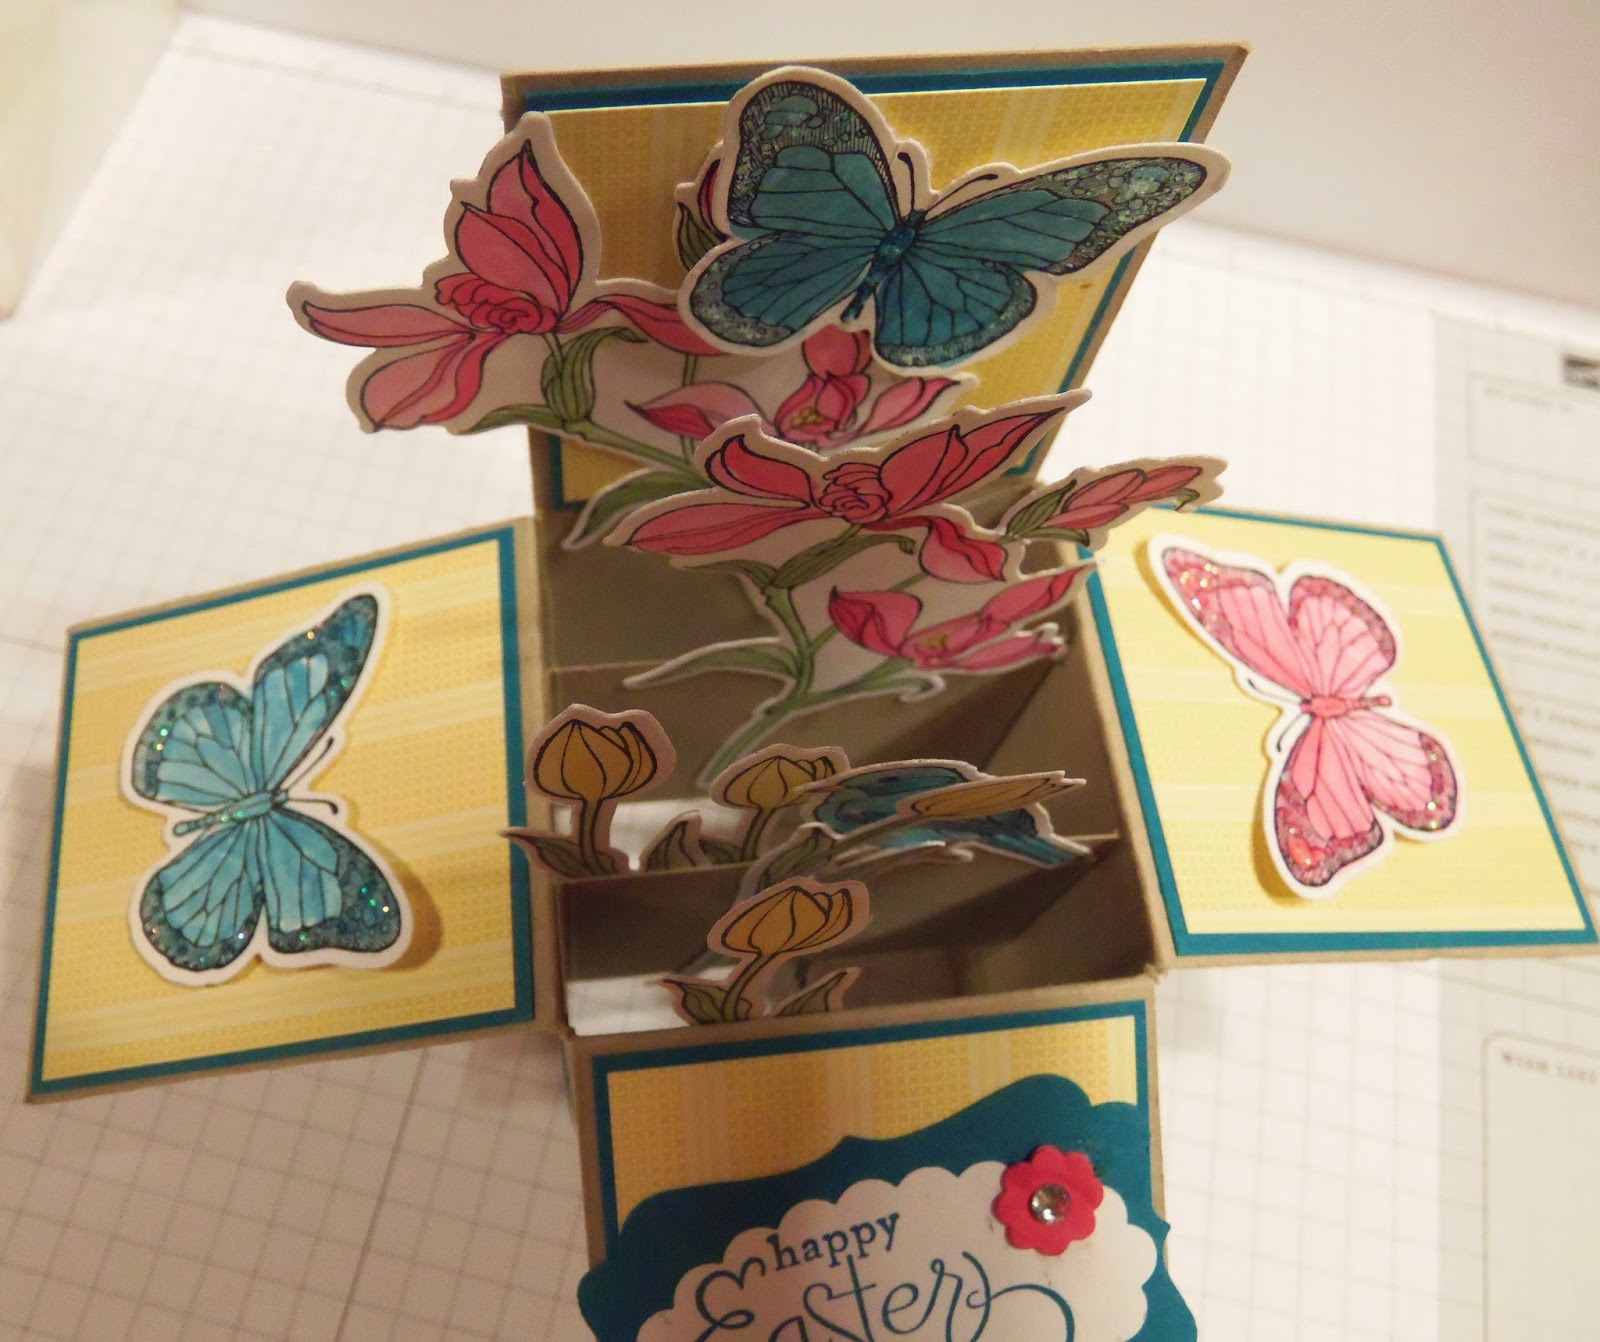
Open from the front, sides and top:


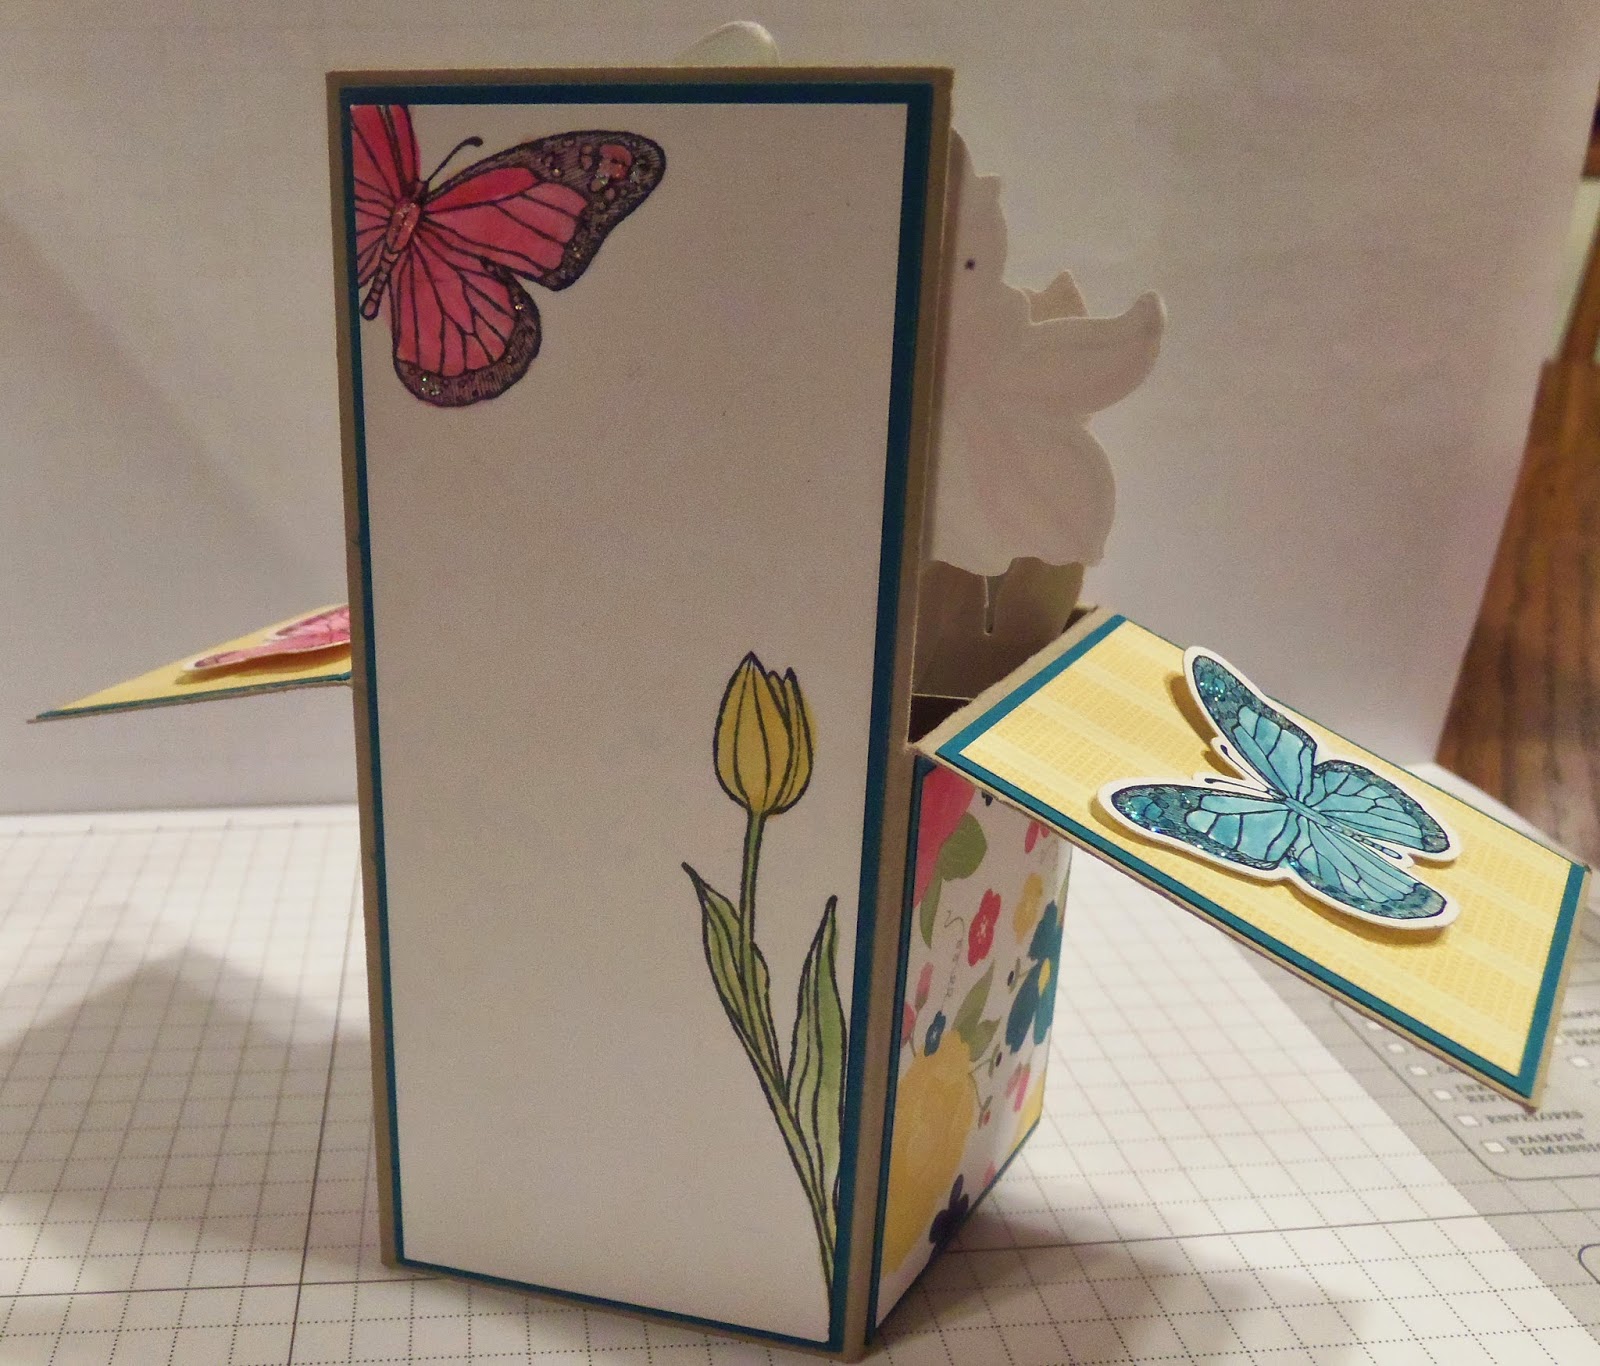
And finally the back:
Want to make one? Cut your base card stock at 9" x 5". With the 9 inch side at the top--score at 2 1/8,
4 1/4, 6 3/8, and 8 1/2. Turn and with the 5 inch side at the top score at 2 3/4". Cut on the score lines of the shorter side (the 2 3/4 inch side is the bottom of the box) and remove that top section of 1/2" on the end down to the 2 3/4" score line. With the 9" side at the top you want to fold the vertical score lines, then add sticky tape to the tab and hook you box together. Putting the tab at the back add your card stock layer to the back side (4 7/8 x 2) so you don't fold down this side (see right above here). Now you can fold on the score lines of your remaining flaps. You will need the 2 tabbed pieces on the inside of the box. You get those by taking a 3 1/8" square of card stock and score it at 1/2 " on either sides then cut the square in half. Fold the tabs one up and one back and put glue on those tabs and stick down in the box dividing the box into thirds with the tabbed pieces. You need these pieces to glue your parts to. Top flaps layers are measured at 2 x 2 1/8 and you need four of those. Bottom layer is 2 5/8 x 2 (you need 3). I also added a layer of d.s.p. to these base layers they were just 1/8" smaller.
Colors I used were: Island Indigo, Daffodil Delight, Melon Mambo and Pear Pizzazz (which were taken from the designer series paper Gingham Garden. I colored all my pieces using the ink in the top of the stamp pad and blender pen. I added some Dazzling Details to my butterflies to give them some life. I love how it turned out--especially the little bird hiding in the tulips. I cased this from Stampin' T and her tutorial on Youtube (but the measurements are not her's).

No comments:
Post a Comment